
 Pin it
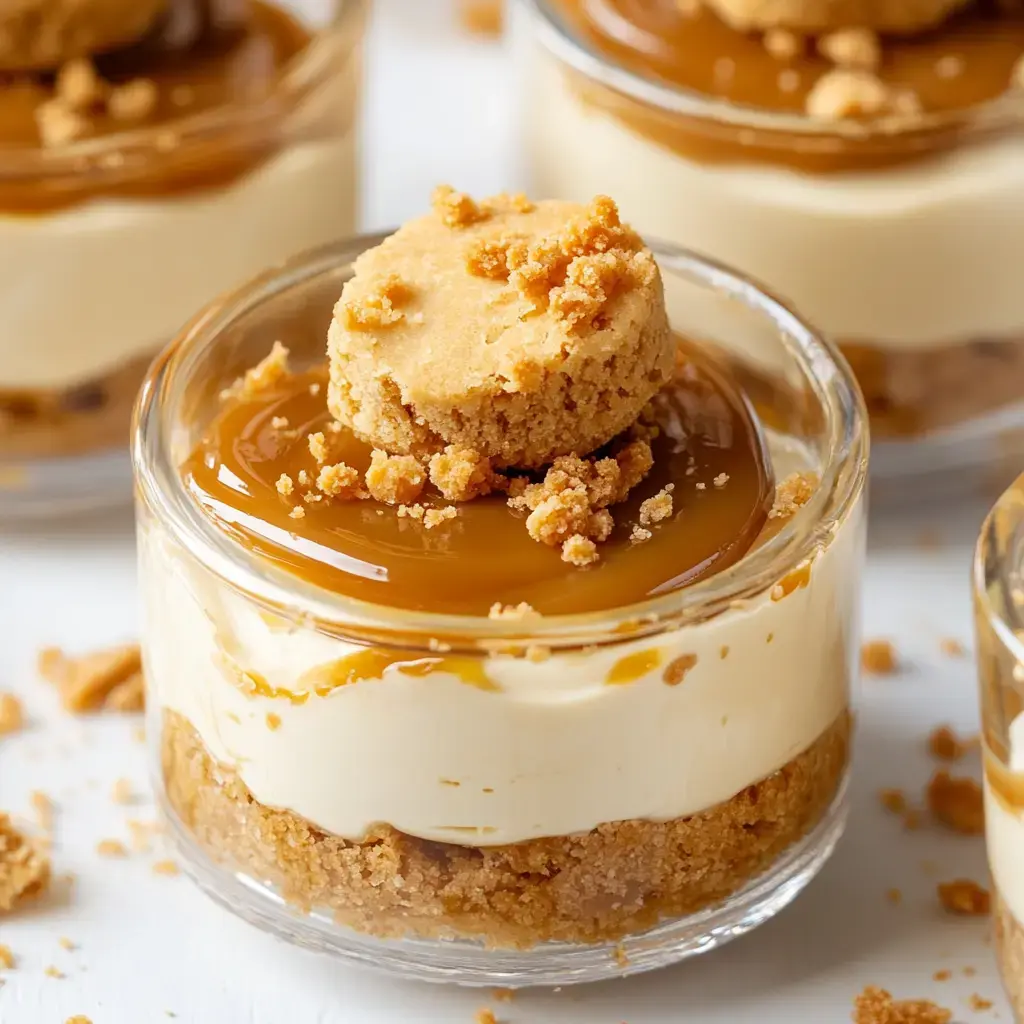
Wow these No-Bake Biscoff Cheesecake Cups totally changed how I think about quick treats. You only need five things to whip up these little treasures that mix crunchy lotus biscuits, velvety cheesecake, and that knockout cookie spread. I can't make them fast enough – they vanish instantly and everyone wants to know my secret.
Indulgent Delight in Each Spoonful
I stumbled on this idea during a scorching hot day when the thought of using my oven made me sweat. The velvety texture combined with that unique speculoos taste had everyone at home squabbling for the final serving. There's something magical about the mix of crispy cookie bottom and that fluffy topping. Once you sample these, you'll be making them all the time.
Skip The Baking Step
The best part? You won't need to deal with hot ovens or tricky water bath methods. Just spend 20 minutes getting everything ready, stick them in your fridge, and you're all set. I often fix these the evening before any get-together since they actually taste better after chilling overnight. They're my go-to trick for easy entertaining.
What Makes These So Special
These sweet cups have become my favorite dessert for good reasons. They're super easy to make – I've never messed them up. That Biscoff flavor is unbeatable if you're into those cookies. The mix of smooth filling and crunchy base feels so fancy. And they look really impressive in separate portions, working great for casual family snacking or fancy dinner events.
What You'll Need
Time to round up what we need. Get those tasty Lotus Biscoff cookies – I always grab extra for snacking. You'll want some plain butter, cream cheese at room temp, fresh heavy cream and some powdered sugar. The real star is that Biscoff spread – it's basically cookie heaven in a jar. I also use vanilla extract because it makes everything taste better. For the finishing touch, I put cookie pieces and extra crumbs on top, though they look great even without.
Making The Base
Let's tackle that yummy base first. I smash the cookies in my food processor, but you can just put them in a bag and crush them with a rolling pin too. Mix your crumbs with melted butter until everything sticks together. Keep some crumbs aside for the top – you'll thank me later for that extra crunch. Then push about 2-3 spoonfuls of the mix into each cup.
 Pin it
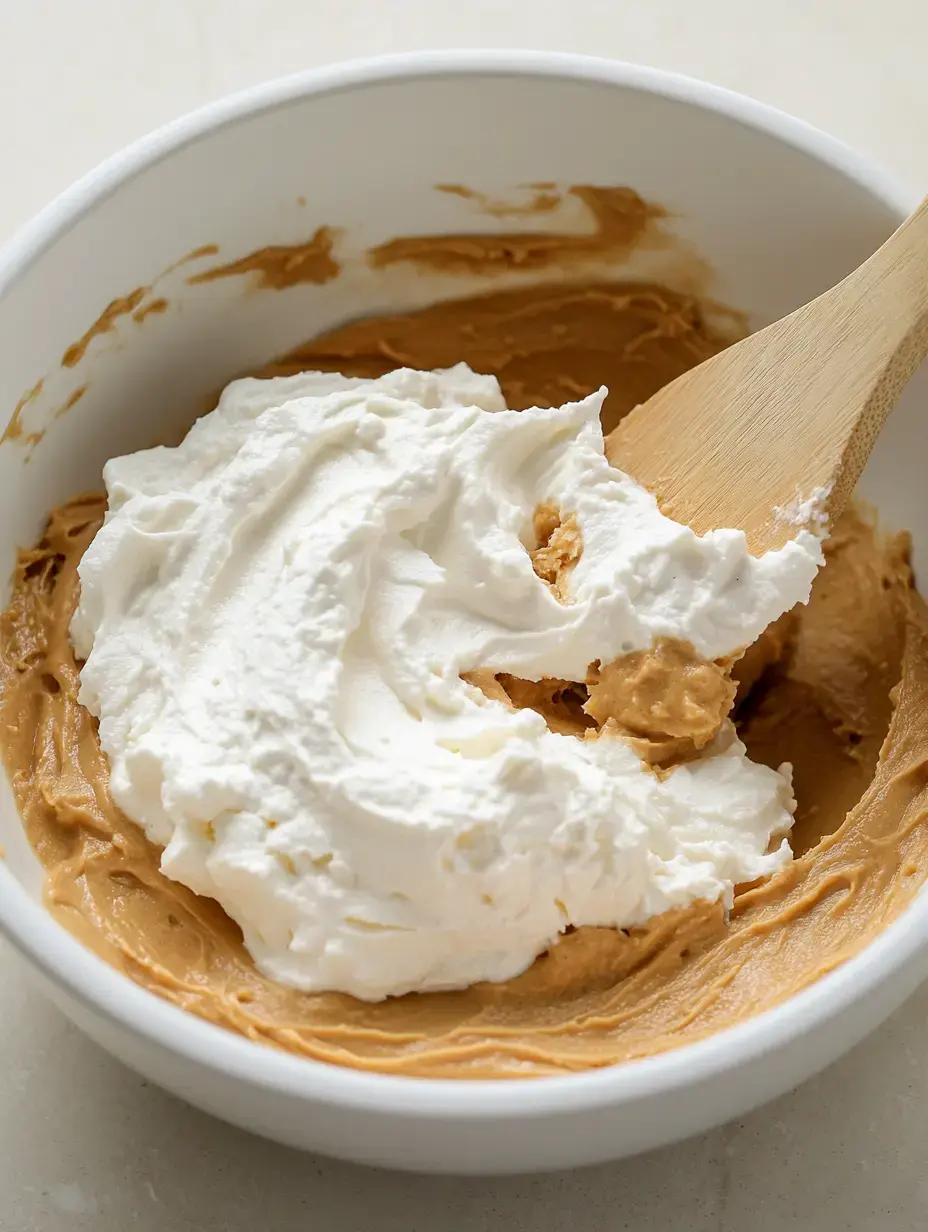
Whipping Up The Topping
Now for the fun part – that amazing filling. First, beat your heavy cream until it forms stiff peaks and looks fluffy. In a separate bowl, blend your cream cheese, powdered sugar, that tasty Biscoff spread and vanilla until it's completely smooth. Here comes the important bit – carefully fold everything together. Don't rush this step, that gentle mixing is what gives us the perfect texture we want.
 Pin it
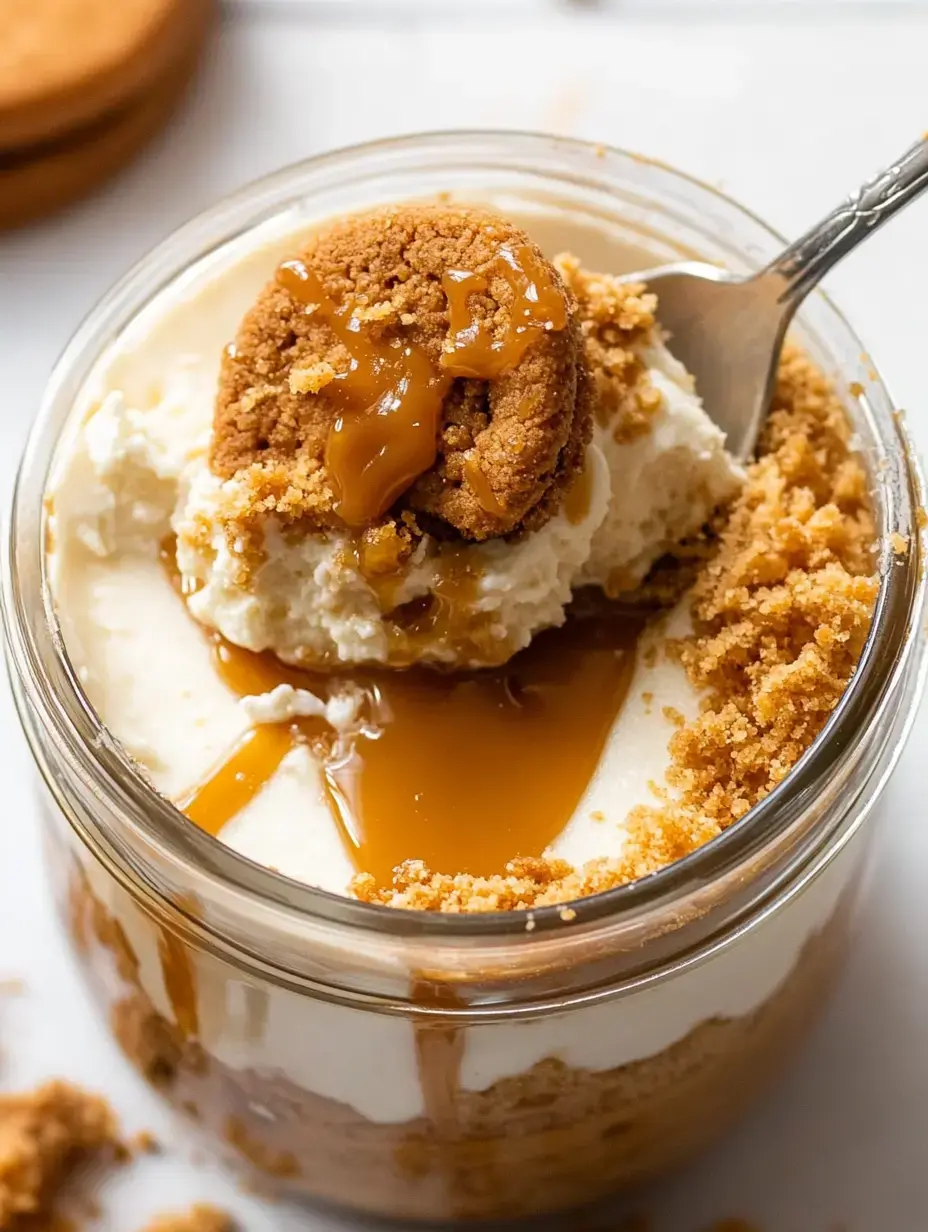
Putting It All Together
Here's a trick I learned after making a mess once: use a piping bag for the filling to keep everything clean and pretty. Add your filling to each cup, then warm some extra Biscoff spread so it pours easily. That drizzle isn't just pretty – it adds an extra pop of flavor that wows everyone. Finish with some cookie bits and maybe half a cookie on top for that fancy look.
Patience Pays Off
This is the tough part – waiting. They need to sit in your fridge at least 4 hours, but I usually fix them the day before. The flavor gets even better the longer they chill. I know you'll want to try them right away, but that waiting time really pays off with the smoothest, creamiest texture.
Helpful Hints
Let me share some tricks I've picked up along the way. Always use heavy cream straight from the fridge – it whips much better when cold. But your cream cheese should be sitting at room temp or you'll end up with bumpy filling. When you're mixing everything together, be super gentle to keep all those air bubbles in the mix. And don't cut the chilling time short, even if everyone's begging for a taste.
 Pin it
Common Questions
People always ask about the cookies and what they taste like – they're basically like spiced shortbread with hints of caramel. Some folks wonder if they should bake these instead, but honestly this no-heat version is perfect as is. And while I wish I could tell you they freeze well, they're really best fresh from the fridge. But that's rarely an issue since they disappear so quickly anyway.
Portion Options
I like to switch up the serving size based on what I'm doing. Tiny shot glasses work great for parties, while bigger cups are perfect for family dessert night. They'll stay good in your fridge for a few days if you cover them well with plastic wrap, but at my house they never stick around that long.
Great For Every Event
These tasty treats have become the dessert everyone expects me to bring. I've made them for kid birthdays, Christmas dinners, and random Tuesday nights. Something about individual portions makes people feel extra special. And they look so fancy that nobody believes how quick they are to make.
Add Your Own Twist
The basic version tastes amazing, but sometimes I play around with different toppings. Try adding some caramel sauce, sprinkle on chocolate chips, or add crushed nuts for extra crunch. The basic recipe is so good you can really have fun changing it up. My kids love helping choose different toppings when we make them together.
Everyone's Favorite
These No-Bake Biscoff Cheesecake Cups bring so much happiness to our kitchen. They show that sometimes the easiest recipes turn out the most magical. Whether you're fixing them for something special or just because you want something sweet, I bet you'll love them as much as we do. Happy no-baking!
 Pin it
Frequently Asked Questions
- → Can I make these ahead of time?
Absolutely, you can prep these cups up to 2 days before serving. Just keep them cold in your fridge until you're ready to enjoy them.
- → How long do they need to chill?
You'll want to cool these cups for at least 4 hours in your fridge. Leaving them overnight works really well too.
- → Can I freeze these cheesecake cups?
They freeze quite nicely for up to 3 months. Just let them thaw in your fridge overnight. Add fresh cookie bits on top after they've thawed.
- → What size cups should I use?
You can go with regular dessert cups to make 8 servings or tiny cups for 24 bite-sized treats. Just tweak your base and filling amounts to fit.
- → Why does the cream cheese need to be room temperature?
Soft cream cheese mixes way better and won't leave lumps in your dessert. Pull it from the fridge about an hour before you start making these.
Conclusion
These quick cups mix rich cream cheese with sweet Biscoff spread, all resting on crunchy cookie crumbs. They're super simple and perfect for gatherings.