
 Pin it
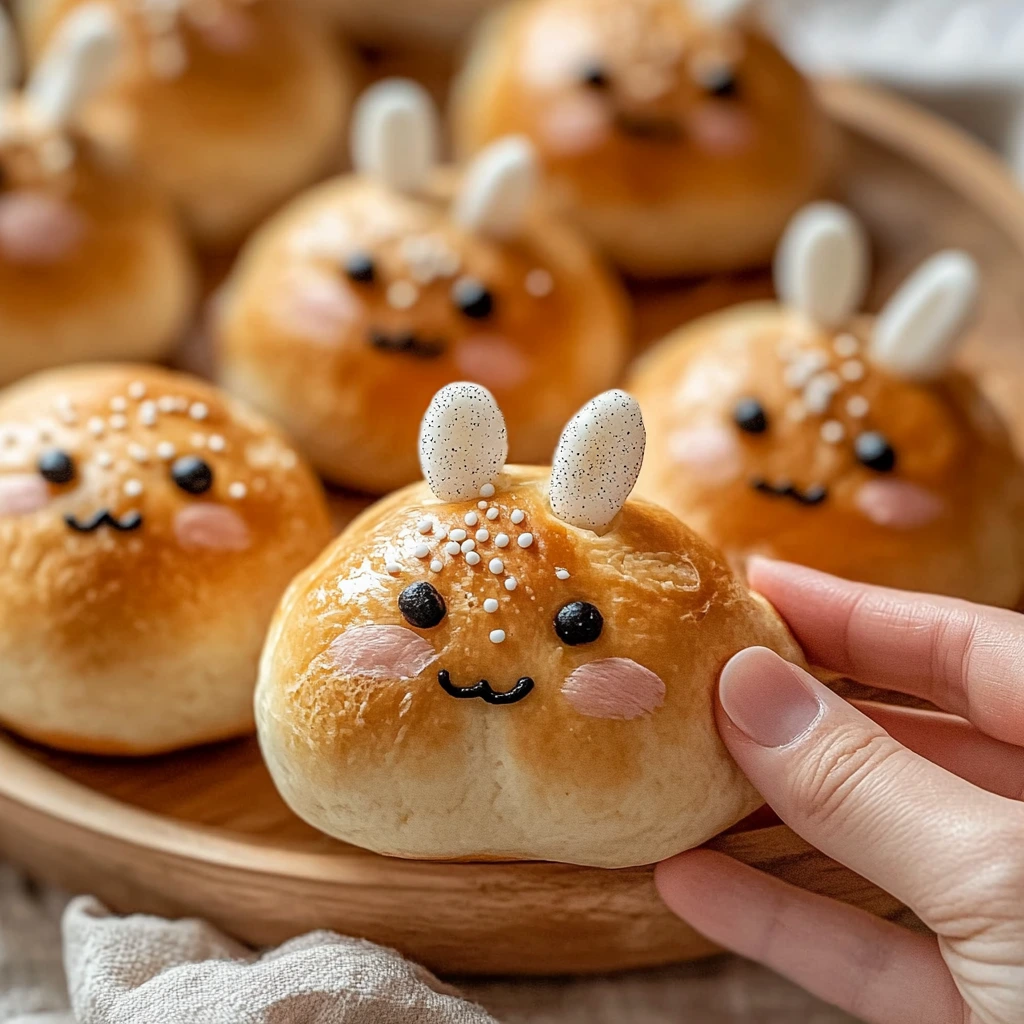
Turn basic yogurt dough into cute Easter bunny rolls that'll jazz up your holiday spread. These sweet treats need just a couple main ingredients and end up looking like real bunnies with ears - they're super fun to make with kids. Each roll comes out soft and fluffy, sure to put smiles on faces young and old.
While hunting for a standout Easter bread, I stumbled on this easy way to bring fun shapes to our table without any fancy baking skills.
Key Ingredients
- Regular yogurt: Works better than Greek style
- Self-raising flour: Gives the right amount of fluff
- Melted butter: Makes them turn golden
- Dash of salt: Brings out the taste
- Food-safe pens: For drawing faces
Bunny-Making Steps
- Whip Up The Dough:
- Stir yogurt and flour together until you get a soft mix.
- Get The Right Feel:
- Sprinkle in flour bit by bit until smooth but still soft.
- Cut Into Pieces:
- Split dough into chunks for making bodies and ears.
- Build Your Bunnies:
- Stick ears onto round bodies at small angles.
- Cook Them Right:
- Look for a nice gold color while keeping them soft inside.
- Let Them Rest:
- Cool a little before you add faces.
- Finish Them Off:
- Use food-safe pens for cute faces if you want.
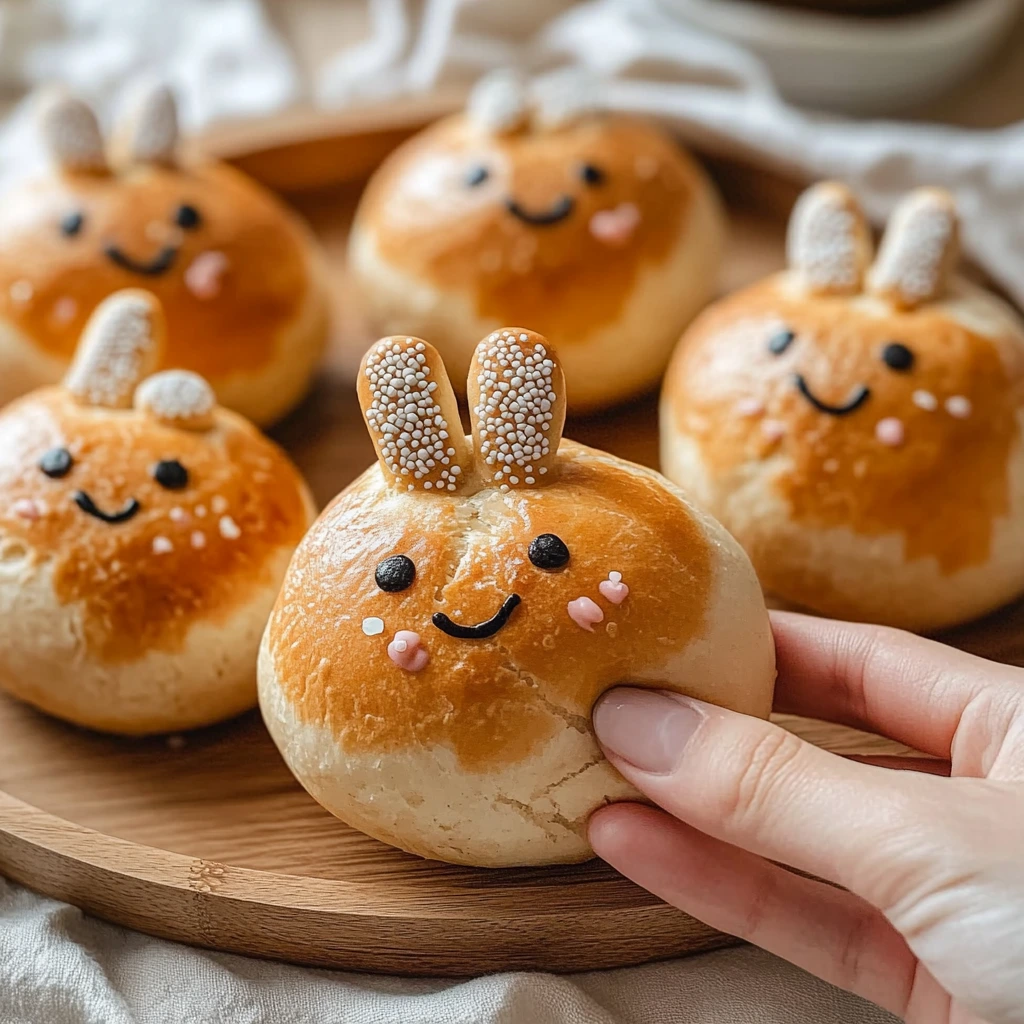 Pin it
My grandma always told me the trick to great bread shapes was taking your time - rush and you'll end up with tough buns.
Ways To Serve
Make these buns the star of your Easter table by setting them on a wooden board with some spring flowers and greenery. They're best warm with some butter and honey on the side. You might try a breakfast spread with colored eggs, fruit, and flowers too. Pop them on vintage dishes with herbs around for a fancy touch.
Fun Twists
Jazz up these easy buns by playing with different looks and tastes. Maybe mix herbs into your dough, or shape them like other animals for fun. You could add cheese for a savory kick, or brush them with sweet honey butter. Try making colored versions with natural food dyes, or sprinkle seeds on top for crunch.
Keeping Them Fresh
Keep your buns tasty by storing them right. They're best fresh from the oven, but will stay good in sealed containers for a day. Warm them up quickly before eating. If you want to plan ahead, freeze the shaped dough and bake straight from frozen. Keep decorated ones in their own container so the designs stay nice.
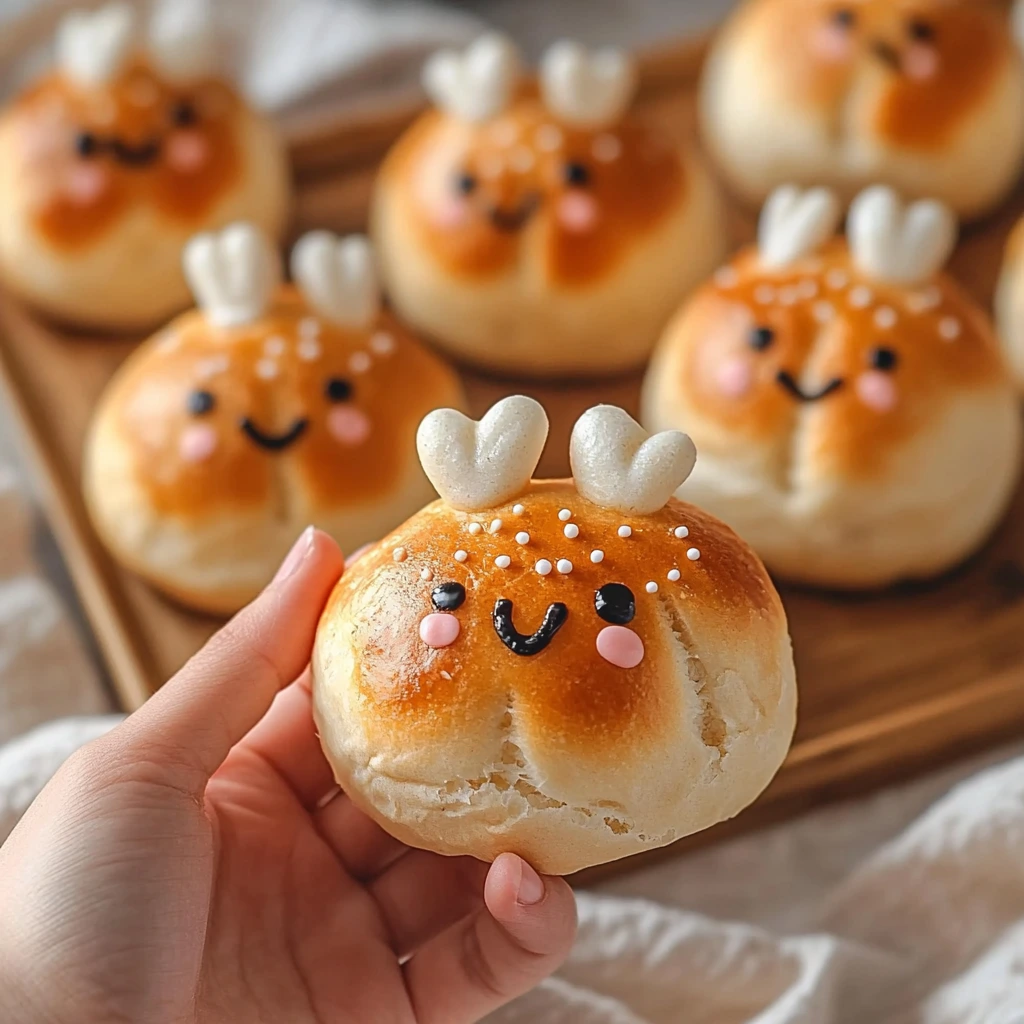 Pin it
These bunny rolls have become something we look forward to every Easter. Though they're not hard to make, taking care with the shaping and baking leads to charming results everyone loves. Just remember, don't rush the shaping process and watch your baking time to get perfect bunny buns every Easter.
Frequently Asked Questions
- → Can I swap plain yogurt with Greek yogurt?
- Definitely! It'll make the buns a little heavier but just as tasty.
- → What can I use instead of self-rising flour?
- Just mix a cup of regular flour with a teaspoon of baking powder.
- → How should I store homemade buns?
- Keep them in a sealed container for 2 days or freeze them for later.
- → Is it okay to prep the dough early?
- Sure! You can refrigerate it for up to 3 days or freeze it for 4 months.
- → Can I make this vegan?
- Yes, swap regular yogurt and butter for dairy-free options.